How to turn on Developer Mode in ChatGPT (Step by Step)
Every click and screen in order: open your profile menu, navigate to Settings, select Advanced, toggle Developer Mode ON, and unlock custom Model Context Protocol (MCP) connectors.
Developer Mode in ChatGPT unlocks one of the most powerful features OpenAI has introduced: native support for the Model Context Protocol (MCP). With Developer Mode enabled, ChatGPT is no longer limited to answering questions — it can call external tools, fetch real-time data, and execute live actions on services like PostMCP AI.
In this visual, step-by-step guide, you’ll learn exactly where the Developer Mode option is located, how to toggle it on, and how to create your first custom connector.
Step 1 — Open the user menu from your profile avatar
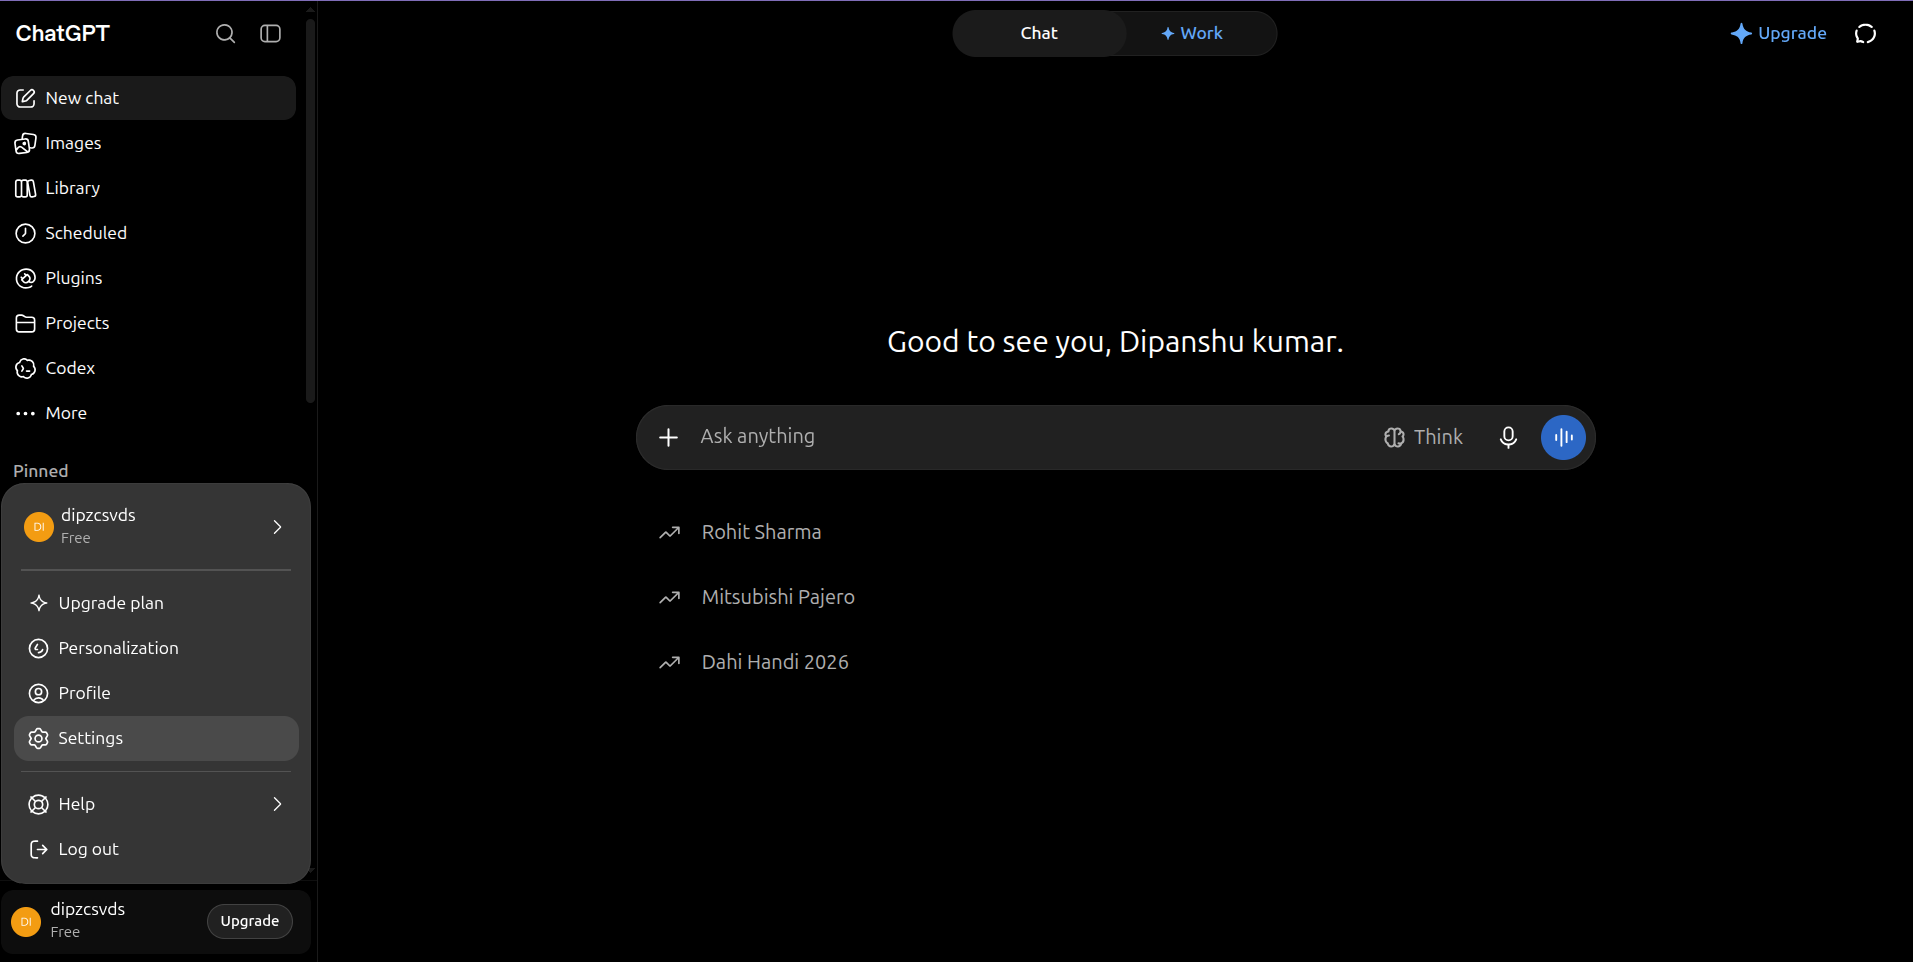
Log in to ChatGPT in your web browser. Look at the bottom-left corner of the sidebar where your profile avatar and account name are displayed.
Click on your avatar or name. A popup menu will open showing your account shortcuts, including Profile, Personalization, Settings, Help, and Log out.
Step 2 — Open ChatGPT Settings
From the user popup menu, click on Settings (indicated by the gear icon). This opens the main preferences modal where account, data, and developer controls reside.
Step 3 — Navigate to the Advanced tab
In the Settings modal, look at the sidebar navigation on the left. You will see tabs such as General, Personalization, Speech, Data controls, and Advanced.
Click on the Advanced tab near the bottom of the list to display developer-specific options.
Step 4 — Toggle Developer Mode to ON
Inside the Advanced tab, find the Developer Mode option. Click the toggle switch on the right so that it turns ON (green).
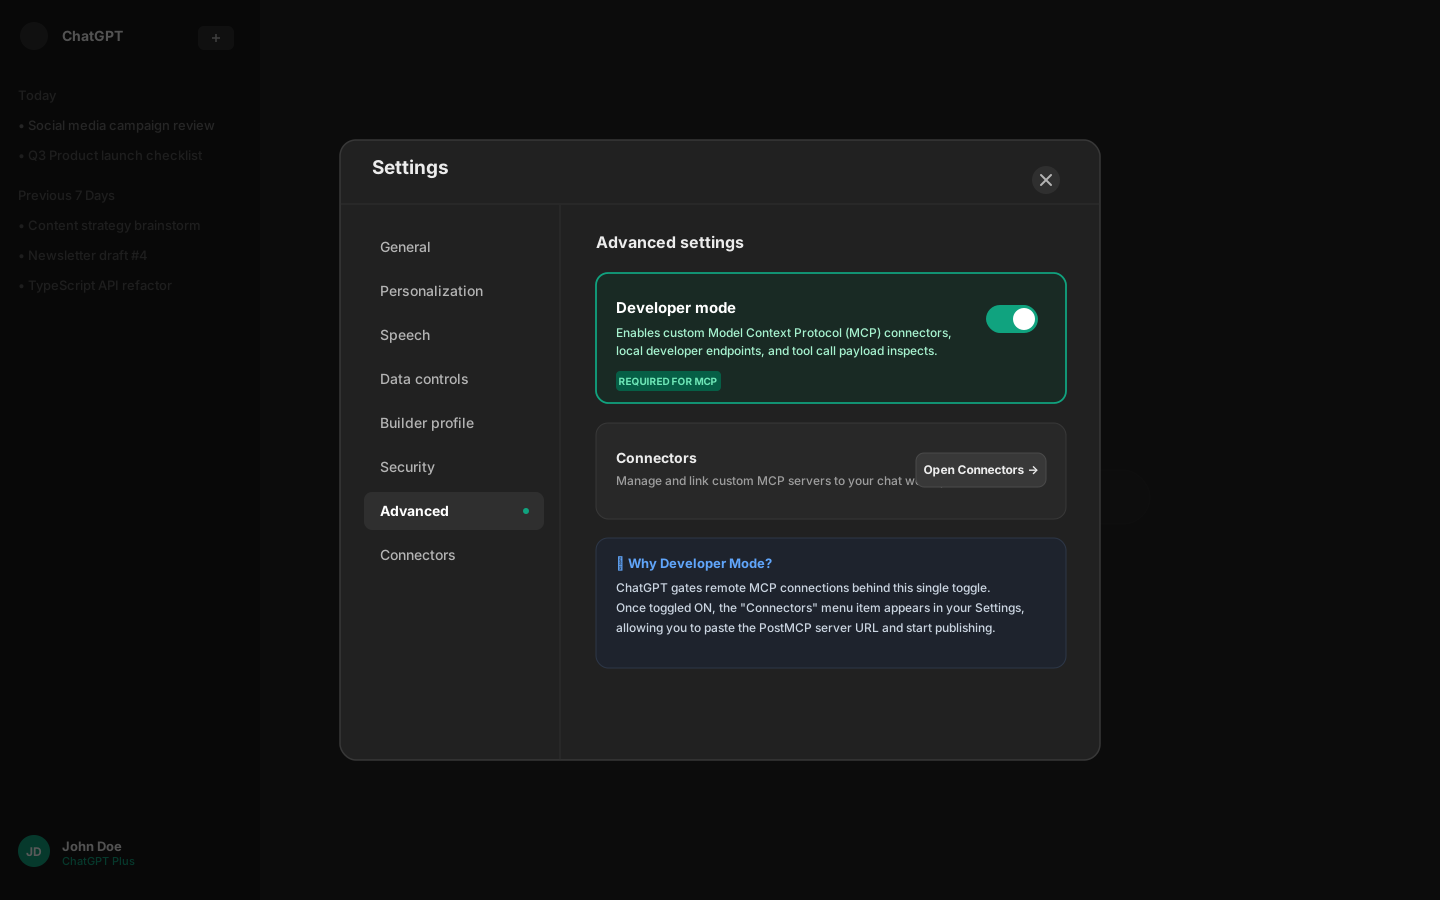
As soon as Developer Mode is turned on, ChatGPT activates its internal protocol engine. You will now see the Connectors (or Plugins / Apps) management menu in your sidebar or settings dialog.
Step 5 — Create a custom MCP Connector (Example: PostMCP AI)
Now that Developer Mode is active, you can link custom MCP servers to give ChatGPT real-world superpowers. For example, connecting PostMCP AI allows ChatGPT to publish and schedule posts to Bluesky, LinkedIn, X, Instagram, Facebook, Threads, and YouTube Shorts.
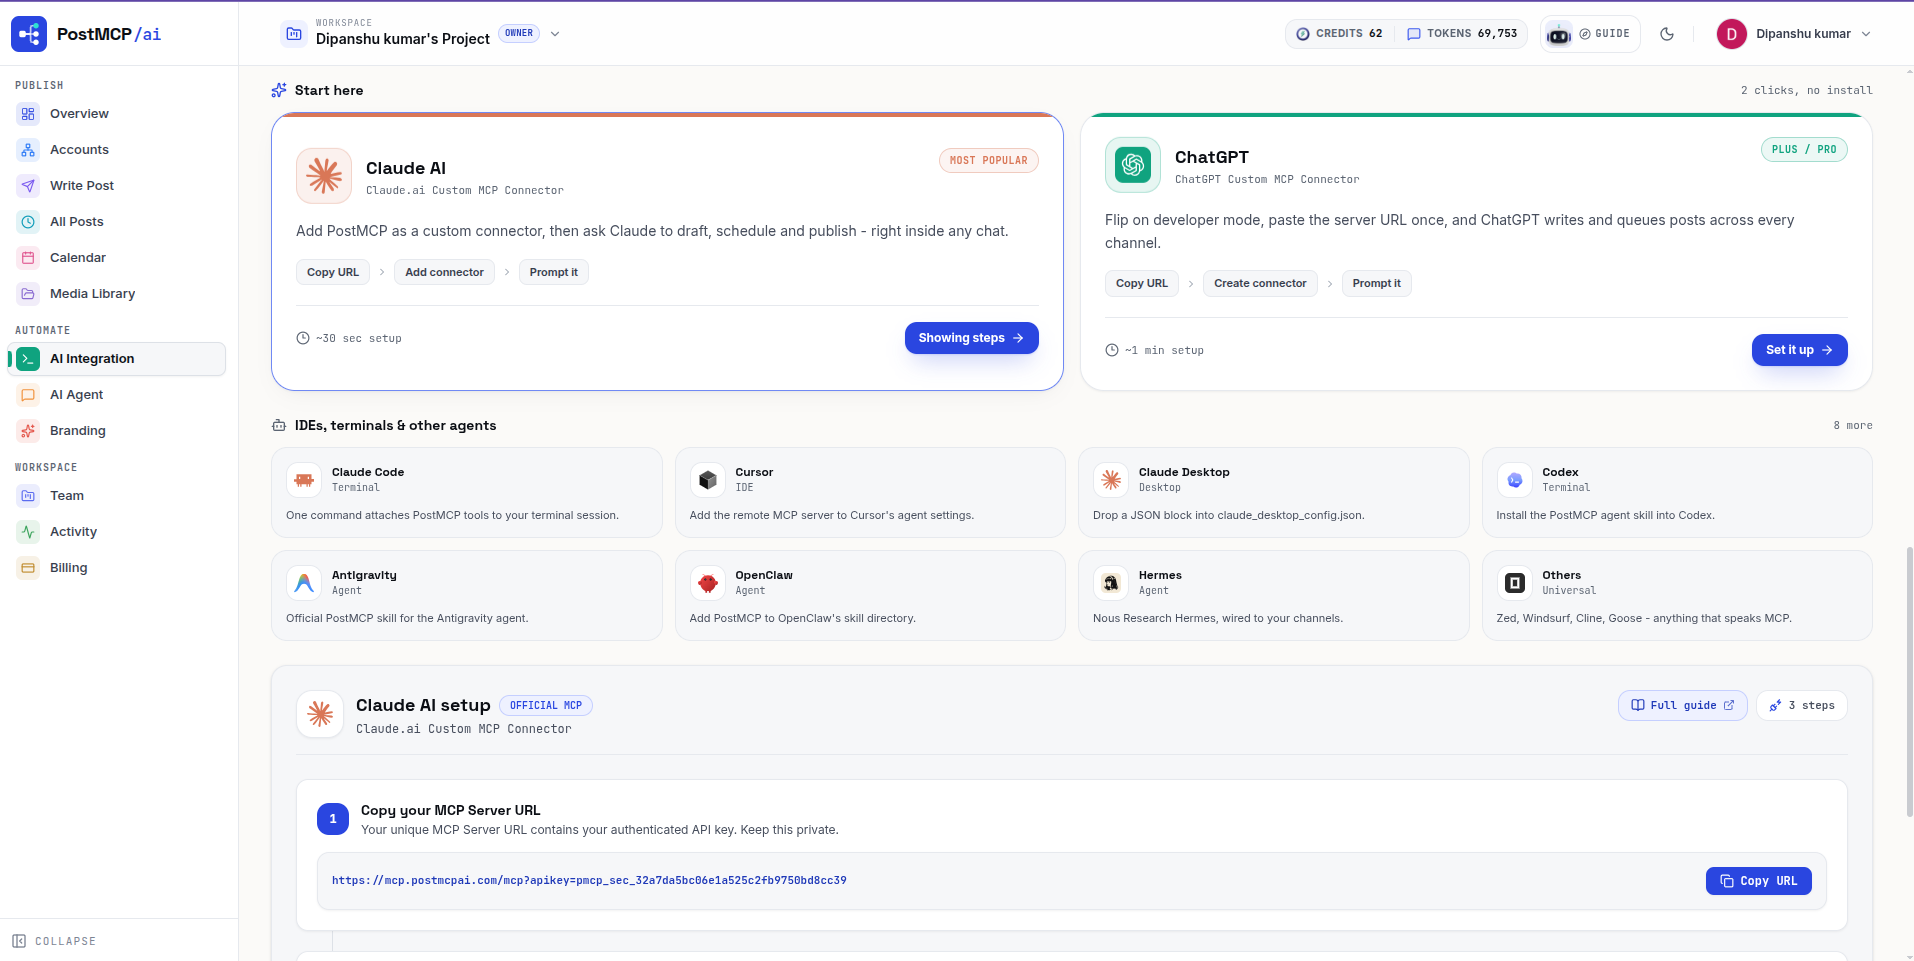
First, grab your unique server URL from your PostMCP AI Integration tab:
Next, open the Connectors menu in ChatGPT (or navigate to chatgpt.com/plugins#settings/Connectors?create-connector=true) and click New App (or Create Connector):
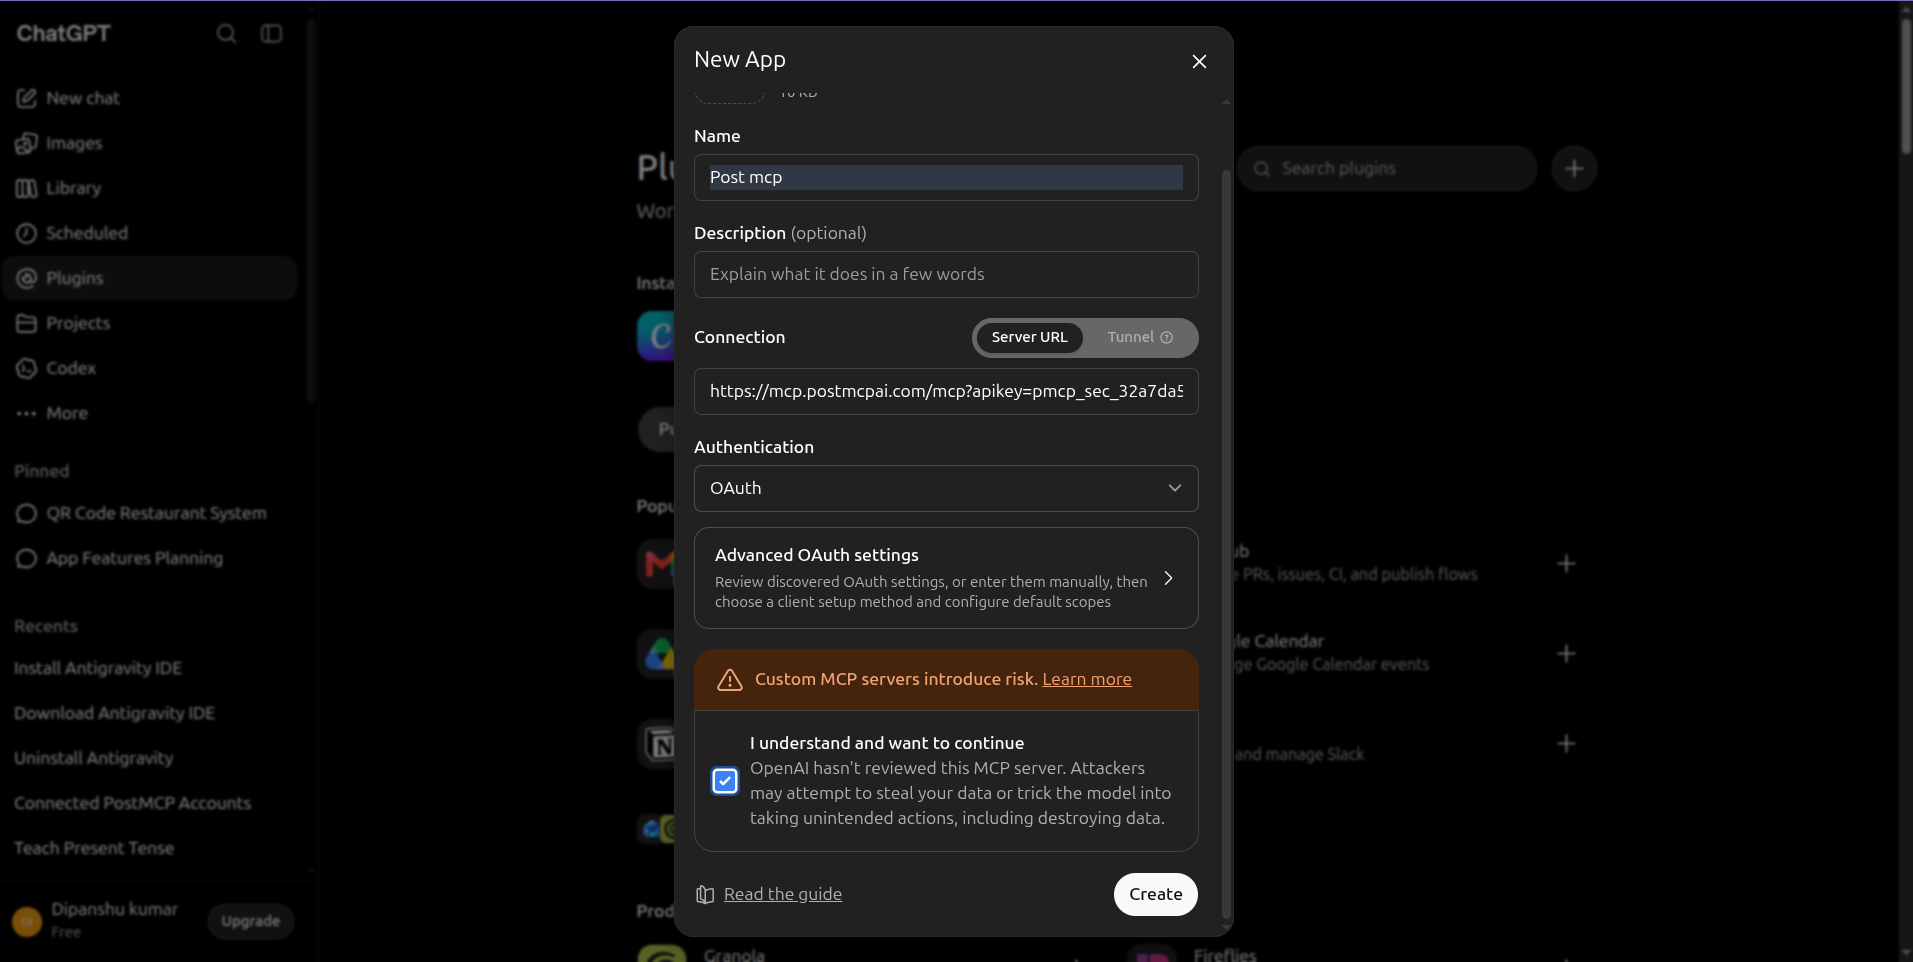
| Setting | Recommended Value | Purpose |
|---|---|---|
| Name | Post mcp (or PostMCP AI) | The display name shown in ChatGPT tool status indicators. |
| Connection Type | Server URL | Direct HTTPS connection (do not select Tunnel). |
| Server URL | https://mcp.postmcpai.com/mcp?apikey=pmcp_sec_••• | Your unique workspace endpoint with embedded API key. |
| Risk Acknowledgement | Checked ("I understand and want to continue") | Required by OpenAI when installing custom developer connectors. |
Click Create. ChatGPT connects to the endpoint, negotiates protocol capabilities, and registers all publishing tools automatically.
Step 6 — Test your developer tools in chat
Once the connector is created, open any new chat conversation. You can now prompt ChatGPT in natural language to invoke your newly registered tools:
“write somthing about ai and post on bluskey using postmcpai”
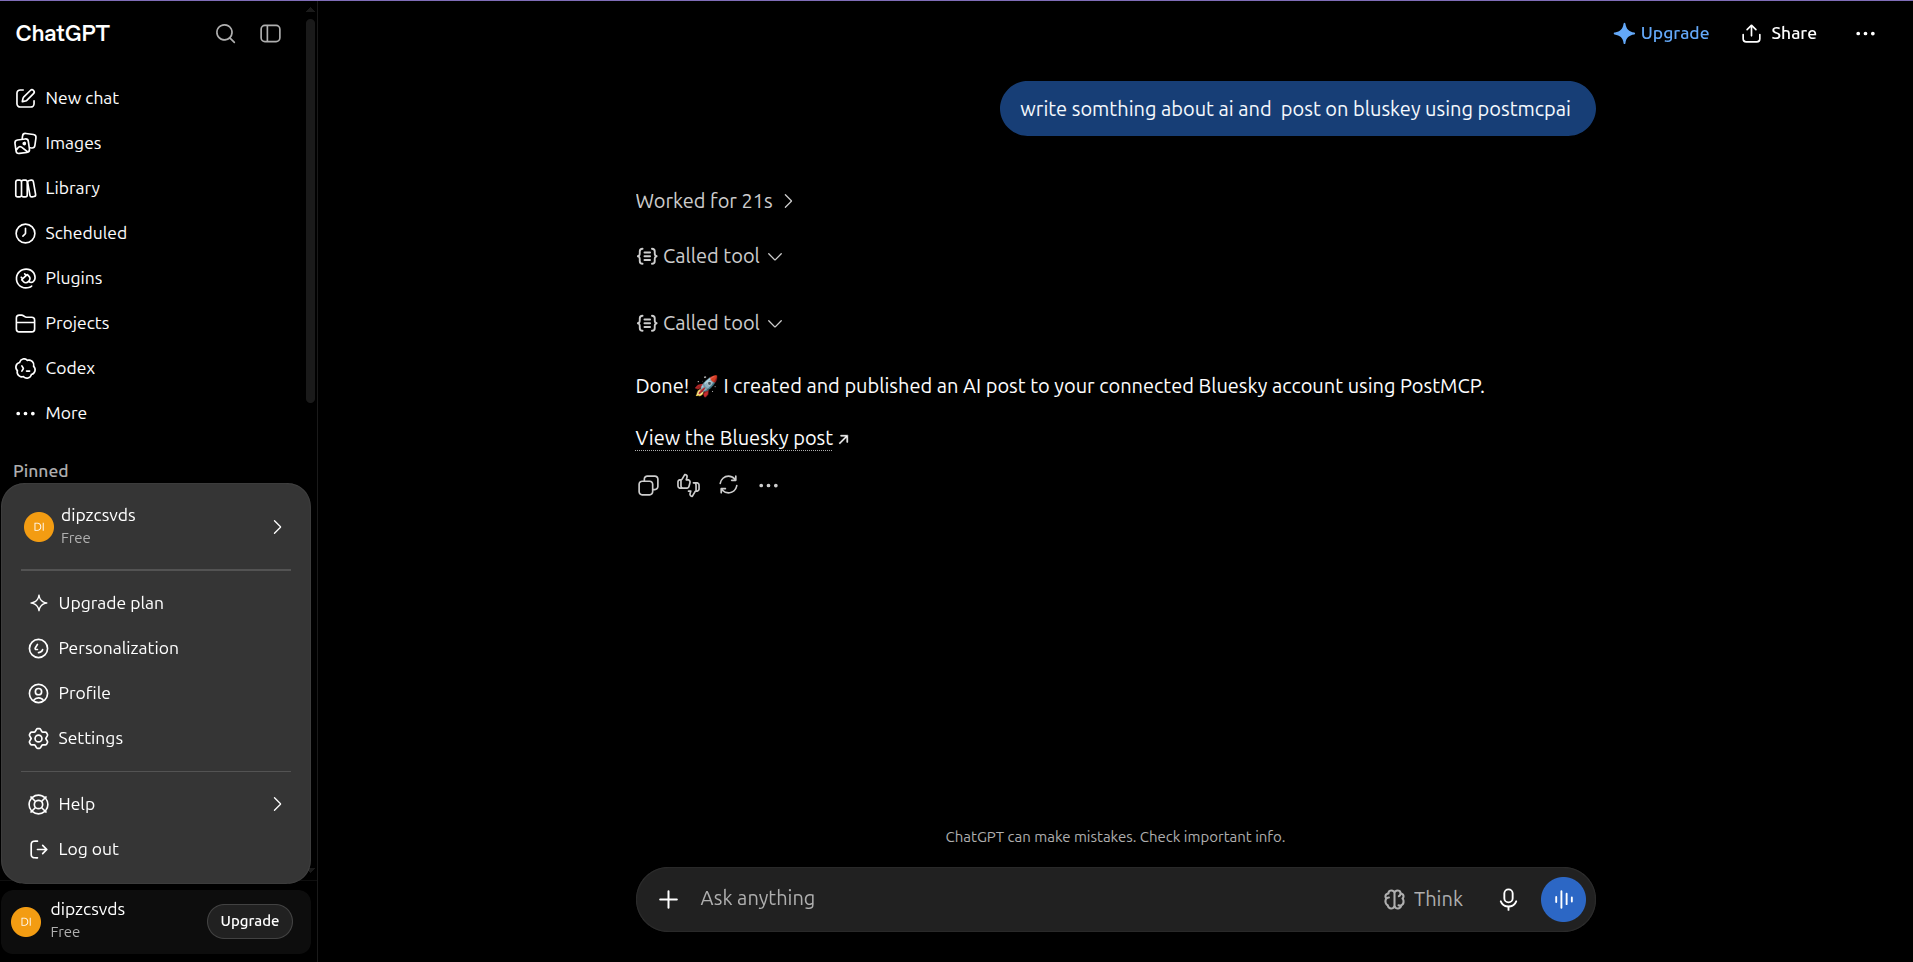
ChatGPT handles the entire flow: checking connected accounts, composing tailored copy, calling the MCP tool (create_post), and returning the live post confirmation link directly in chat.
Troubleshooting: Why can’t I see Developer Mode?
- 1Confirm your subscription tier
Developer Mode is strictly available on ChatGPT Plus, Pro, Team, and Enterprise tiers. Free tier accounts do not have the Developer Mode toggle under Advanced settings.
- 2Check Enterprise workspace policies
If you are using a corporate or Team account, your workspace admin may have restricted custom developer connectors. Contact your admin to enable developer permissions.
- 3Use the web browser version
Developer Mode settings and MCP connector creation are primarily configured on the web application (chatgpt.com). If you are using the mobile app, open a desktop browser to enable the setting.
- 4Clear browser cache and reload
If you recently upgraded your subscription, log out of ChatGPT, clear your browser cache, and log back in to ensure your session permissions refresh.
Next Steps
Now that Developer Mode is active in ChatGPT, check out our complete guide on how to connect ChatGPT to PostMCP AI to automate posts across Bluesky, LinkedIn, X, Facebook, Instagram, Threads, and YouTube Shorts.
Frequently asked questions
- What is Developer Mode in ChatGPT?
- Developer Mode is an advanced configuration in ChatGPT that activates OpenAI’s Model Context Protocol (MCP) client. Once enabled, ChatGPT can connect to custom external MCP endpoints (like PostMCP AI), allowing you to interact with databases, third-party APIs, and social media publishing engines directly from chat conversations.
- Who can turn on Developer Mode in ChatGPT?
- Developer Mode is available to ChatGPT Plus, Pro, Team, and Enterprise subscribers. Free accounts do not currently have access to Developer Mode or custom MCP connectors.
- Where do I find Developer Mode in ChatGPT settings?
- Click your profile avatar or name in the bottom-left corner of the sidebar, select Settings, click the Advanced tab in the left-hand menu, and toggle Developer Mode to ON.
- Does enabling Developer Mode cost extra?
- No. Developer Mode is included with your existing ChatGPT Plus, Pro, Team, or Enterprise subscription. External MCP servers may have their own usage tiers (for example, PostMCP AI includes 20 free monthly posts).
- Can I disable Developer Mode whenever I want?
- Yes. You can return to Settings → Advanced at any time and switch the toggle back to OFF. Doing so simply hides your custom connectors without deleting your chat history.